When an emergency strikes, having the right gear can make all the difference in getting home safely. Most would agree that being prepared with a well-stocked get home bag is crucial.
In this post, you'll discover the ultimate list of must-have items to include in your get home bag for 2023. From water and food to first aid and self-defense, you'll find practical recommendations on the gear you need to handle any situation.
We'll cover how to pack the perfect bug out bag that's not too heavy yet contains versatile tools for both urban and wilderness scenarios. You'll get tips on building a custom get home bag checklist tailored to your climate and needs, accessing a PDF checklist to print out, plus plenty more guidance on assembling your go-to emergency kit.
Introduction to Get Home Bag Essentials
This post will provide a complete guide to packing the essential items for your best get home bag to ensure you're prepared for any emergency situation while getting home safely.
Understanding the Concept of a Get Home Bag
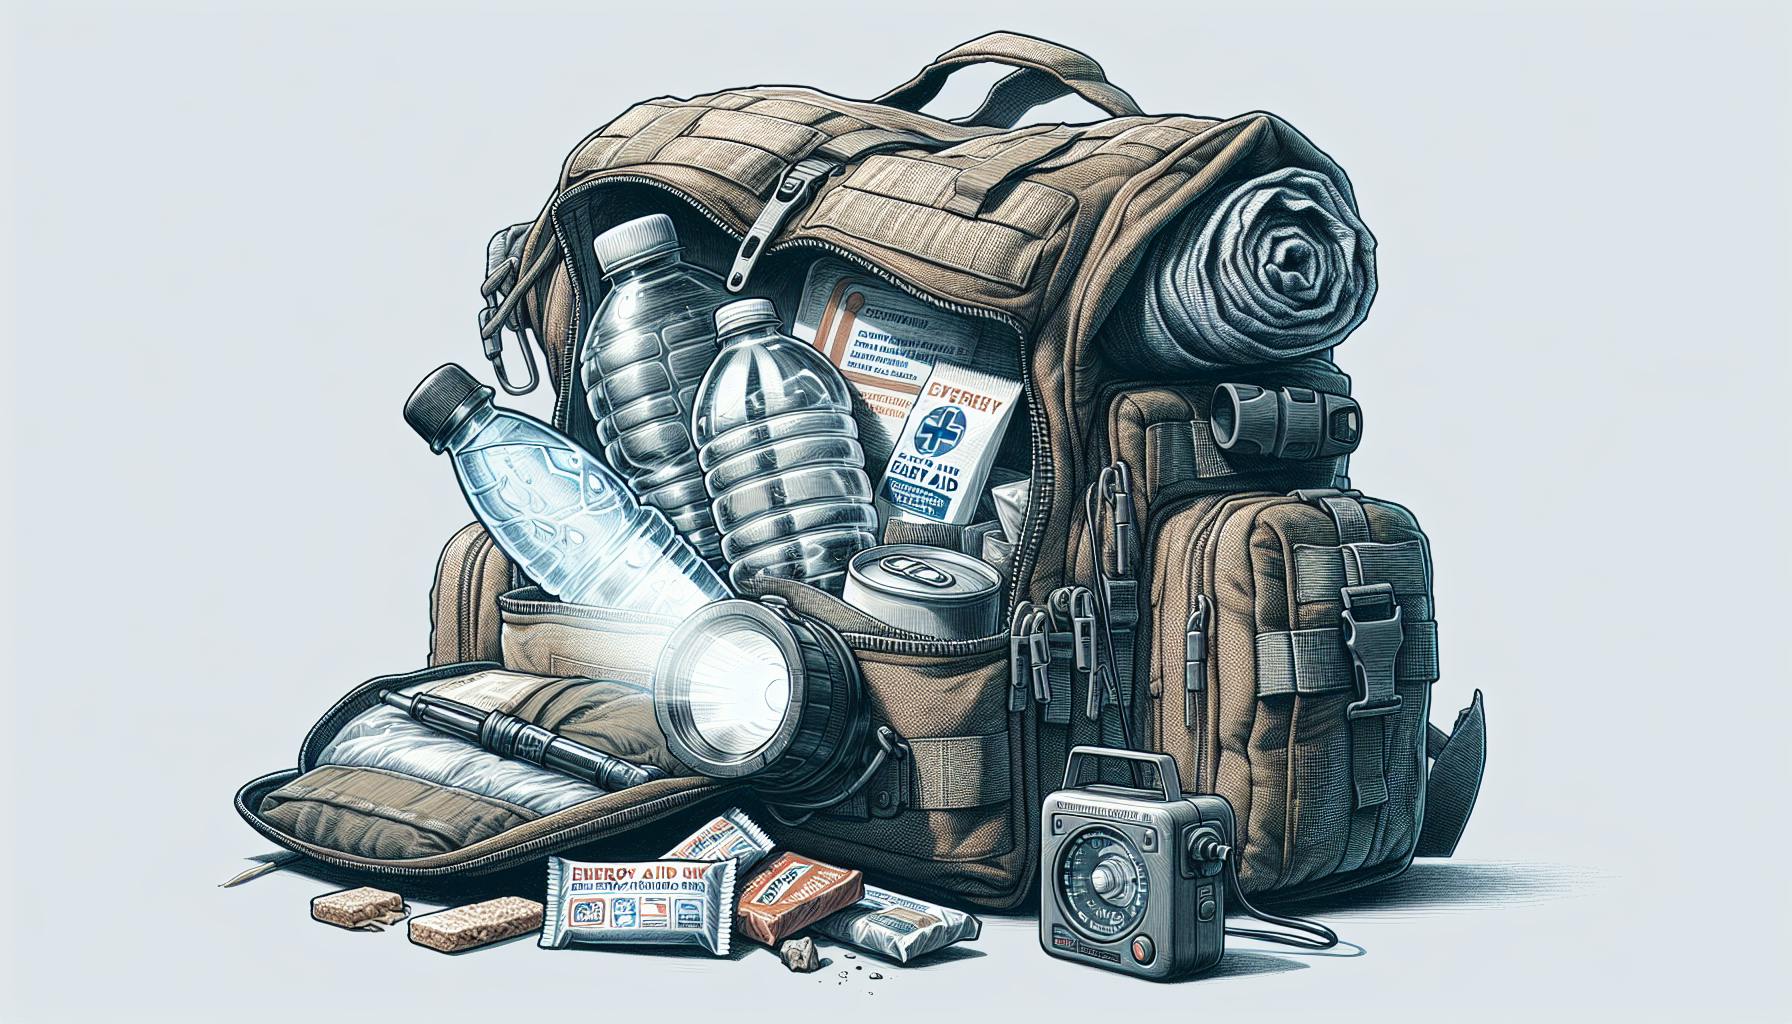
A get home bag, sometimes called a bug out bag, is a backpack filled with gear to help you safely get home in an emergency. It prepares urban dwellers for disasters, letting them shelter in place or evacuate as needed. Key items include food, water, first aid, navigation tools like a map and compass, weather-appropriate clothes, a flashlight, and small personal comfort items. A get home bag lets city preppers survive for 24-72 hours, giving them time to get home on foot or reach safety.
Essential Components of a Get Home Bag Contents List
The exact get home bag checklist contents will vary, but these categories form the core:
- Water and food: Pack high-calorie survival food bars plus a water filter or purification tablets to avoid dehydration or hunger.
- Navigation: Include a compass, local maps, and other land navigation tools.
- Illumination: A headlamp lets you move safely at night.
- First aid: A compact first aid kit containing bandages, ointments, medicines, etc. can save your life if injured.
- Fire making: Waterproof matches, lighter, tinder and kindling help build campfires.
- Shelter: A bivvy, sleeping bag, and tarp protects against the elements.
- Multi-tool or knife for cutting, prying, and self-defense.
Tailor the exact items to your climate, terrain, and potential threats.
Selecting a Bag: Balancing Capacity and Must Be Light
Choosing the bag itself requires balancing capacity and weight. Look for around 20L capacity or less to avoid overpacking and becoming overloaded. Seek lightweight, durable fabrics that don't tear or leak easily. Compartments help organize gear efficiently. Most importantly, test bags with full gear loads before buying to ensure carrying comfort over long distances.
Customizing Your Get Home Bag List for 2023
Modern get home bags incorporate innovations like:
- USB battery packs to recharge devices
- Waterproof pouches to protect phones/electronics
- Lightweight, packable rain gear
- High-calorie SHTF food bars
- Ultralight shelters like bivy sacks
- Multi-tool pens for writing and survival uses
Check sites like WeLovePrepping.com for the latest gear to build the best get home bag list for your needs.
Accessing a Get Home Bag Checklist PDF
See a downloadable get home bag checklist PDF here: Get Home Bag Checklist 2023
Use the checklist to audit and organize your own bag's contents. Customize it by adding or removing items to match your situation. Update it yearly as innovations emerge.
With the right gear and knowledge, get home bags let urban preppers survive disasters and get home safely. Preparedness empowers self-reliance.
How heavy should a get home bag be?
You should aim to keep your get home bag under 20 pounds, not including the clothes you will change into immediately. Carrying too much weight can slow you down and tire you out faster.
Ideally, choose a lightweight, durable, and comfortable backpack that blends into your surroundings. In some situations, you don't want to draw unnecessary attention to yourself and the gear you're carrying.
Here are some tips to limit the weight of your get home bag:
- Prioritize essentials. Focus on items needed for navigation, first aid, food, water, shelter, and signaling/communication. Leave non-critical gear behind.
- Choose lightweight options. Opt for ultralight versions of gear when possible e.g. titanium cookware, emergency bivys instead of tents.
- Limit redundancy. Avoid packing multiples of heavy items like knives, unless absolutely necessary.
- Consider multi-use items. Choose gear that serves more than one purpose to minimize total items carried.
- Balance utility and weight. Don't sacrifice critical tools solely to shed ounces. But do analyze whether heavy items are truly justified.
With some planning and intentional choices, you can assemble a best get home bag that provides the essential functions you need without overburdening you. Test and adjust your loadout to find the right balance for your situation.
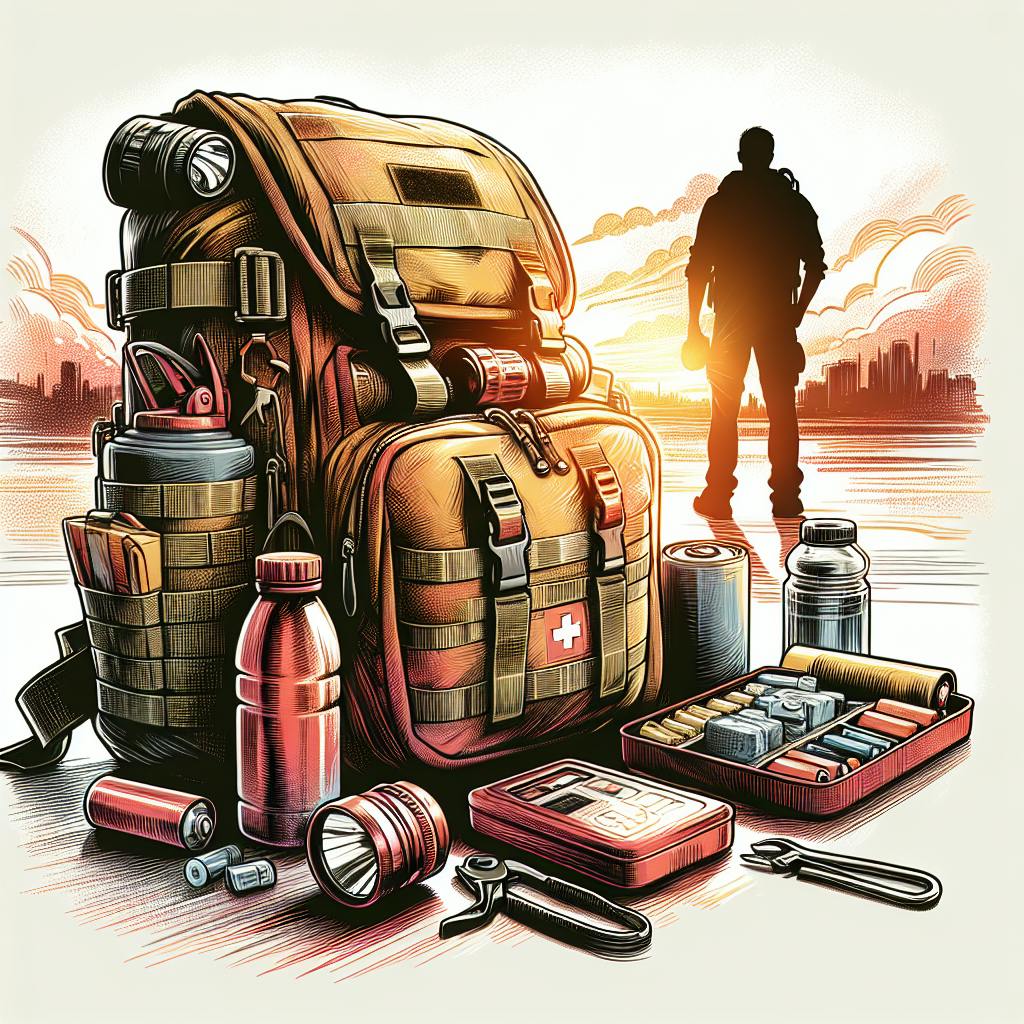
What do you put in a go bag?
A go bag, also known as a get home bag, is an essential emergency preparedness item that contains supplies to help you get home safely or survive for several days in the event of a disaster or emergency situation. Here are some of the most important things to include in your go bag:
Food and Water
Having food and water is critical in an emergency situation where you may be away from resources for an extended period. Some good options to pack include:
- High calorie, non-perishable foods like protein bars, trail mix, beef jerky, peanut butter packets
- Packets of instant oatmeal or dehydrated camping meals
- Canned goods with pop-top lids
- Bottled water and a water filtration system like a LifeStraw
Power and Communication
Being able to charge devices and access information is vital. Have these items on hand:
- Portable phone charger and charging cables
- Hand crank or solar powered radio to receive emergency broadcasts
- Flashlight or headlamp with extra batteries
First Aid
You never know what minor injuries you may sustain, so pack:
- Adhesive bandages
- Gauze
- Antibiotic ointment
- Medications
- Other essential medical supplies
Tools and Navigation
Equip yourself to handle obstacles along your route:
- Multi tool or Swiss Army Knife
- Emergency whistle
- Local map
- Compass
- Cash in small bills
Clothing and Shelter
Include extra layers, rain protection, and basic shelter items:
- Extra socks and underwear
- Weather appropriate layers
- Rain poncho
- Emergency blanket or tarp
Customize your go bag based on your specific needs, but these basics will help you safely get home or shelter in place if disaster strikes. Periodically inspect and resupply items as needed.
What is the difference between a bug out bag and a go bag?
Both go bags and bug out bags contain essential supplies to help you survive an emergency situation where you need to leave quickly. However, there are some key differences:
-
Purpose: A bug out bag is designed for evacuation during a major disaster when you may be away from home for an extended period. A get home bag contains supplies to help you get home safely during a sudden emergency.
-
Size: Bug out bags are usually larger since they contain supplies for multiple days. Get home bags are more compact and lighter to make carrying easier.
-
Distance: The focus of a get home bag is reaching your home up to a few dozen miles away. A bug out bag prepares you for potentially travelling hundreds of miles.
-
Supplies: While there is some overlap, the contents vary based on intended use. For example, a get home bag focuses more on navigation and signaling devices to assist your trip home.
The most important factors are understanding your situation and likely risks. This determines whether assembling a get home bag for short-term use or a larger bug out bag for longer durations best suits your needs. With some adjustments, either bag can pull double duty and serve as everyday carry in a pinch. Focus on versatility and multi-use items to build an effective emergency bag.
How many liters is a get home bag?
Since your trip back home usually won't reach two days or more, a get home bag should have a 50 L max capacity or smaller. Your body type—or your torso, to be more precise—is also another thing to consider when it comes to the size of your get home bag. The smaller your torso, the smaller the pack.
Here are some key tips for determining the ideal size for your get home bag:
-
Assess your needs: Consider what essential items you'll need to carry (food, water, first aid, tools, etc.) and choose a pack size that fits everything comfortably without excess unused space.
-
Test different sizes: Try packing different sized bags with your gear and wearing them to get a feel for the right fit and weight distribution for your body size and strength.
-
Aim for lightweight: Focus on compact, lightweight gear so you don't overburden yourself carrying a heavy bag over long distances. High quality ultralight gear helps minimize pack size.
-
Adaptability: Pick a bag that has exterior attachment points and expandable storage so you can strap on additional gear if an unexpected need arises during your journey.
-
Torso fit: When worn, the bag should ride high on your back without sagging or interfering with arm movement so you can travel efficiently. Consider getting your torso measured properly when selecting a pack.
The ideal get home bag capacity can vary from person to person depending on your situation, but for most urban commuters a 20-35 liter bag provides ample space without being oversized if packed intelligently. Test out different pack sizes during training hikes to dial in your optimal liter capacity.
Water and Hydration Strategies
Having reliable access to clean drinking water is critical in an emergency situation. When preparing your get home bag, be sure to include water purification tablets, a metal canteen or water bottle, and a portable water filter. These items will allow you to collect and purify water from streams, ponds, and other sources if tap water becomes unavailable.
Choosing Reliable Water Containers
Look for water containers that are durable, lightweight, and collapsible when empty. Good options include:
- Stainless steel canteens or water bottles - durable and reusable
- BPA-free plastic bottles - collapsible when empty
- Foldable water bags - take up less space when not in use
Aim for at least 1 liter capacity. Make sure any containers have secure lids to prevent leaks or spills.
Water Purification Methods
To ensure safe drinking water:
- Use water purification tablets according to package instructions
- Filter cloudy water through a small portable water filter
- Boil water rapidly for 1 minute (3 minutes at high altitude)
Be prepared to purify water from outdoor sources in an urban emergency scenario.
Hydration for Urban Get Home Bags
As you may need to travel several miles on foot in an urban area, proper hydration is key. Pack at least 2 liters of water, along with electrolyte tablets to replenish salts and minerals lost from sweating. This will provide enough drinking water for a full day's hike. Replenish from tap water when possible.
Emergency Water Sources and Collection
If tap water is not available, look for flowing streams, rivers, ponds or lakes. Avoid stagnant water or containers that may be contaminated. Boil or filter any outdoor water before drinking. You can also collect rainwater or drain water from water heaters if absolutely necessary.
Maintaining Water Quality
Replace stored water every 6 months. Check containers for leaks, cracks or damage before packing. Use water purification tablets at half strength to help preserve stored water quality over time. Keep containers out of direct sunlight to prevent algae growth.
sbb-itb-b932644
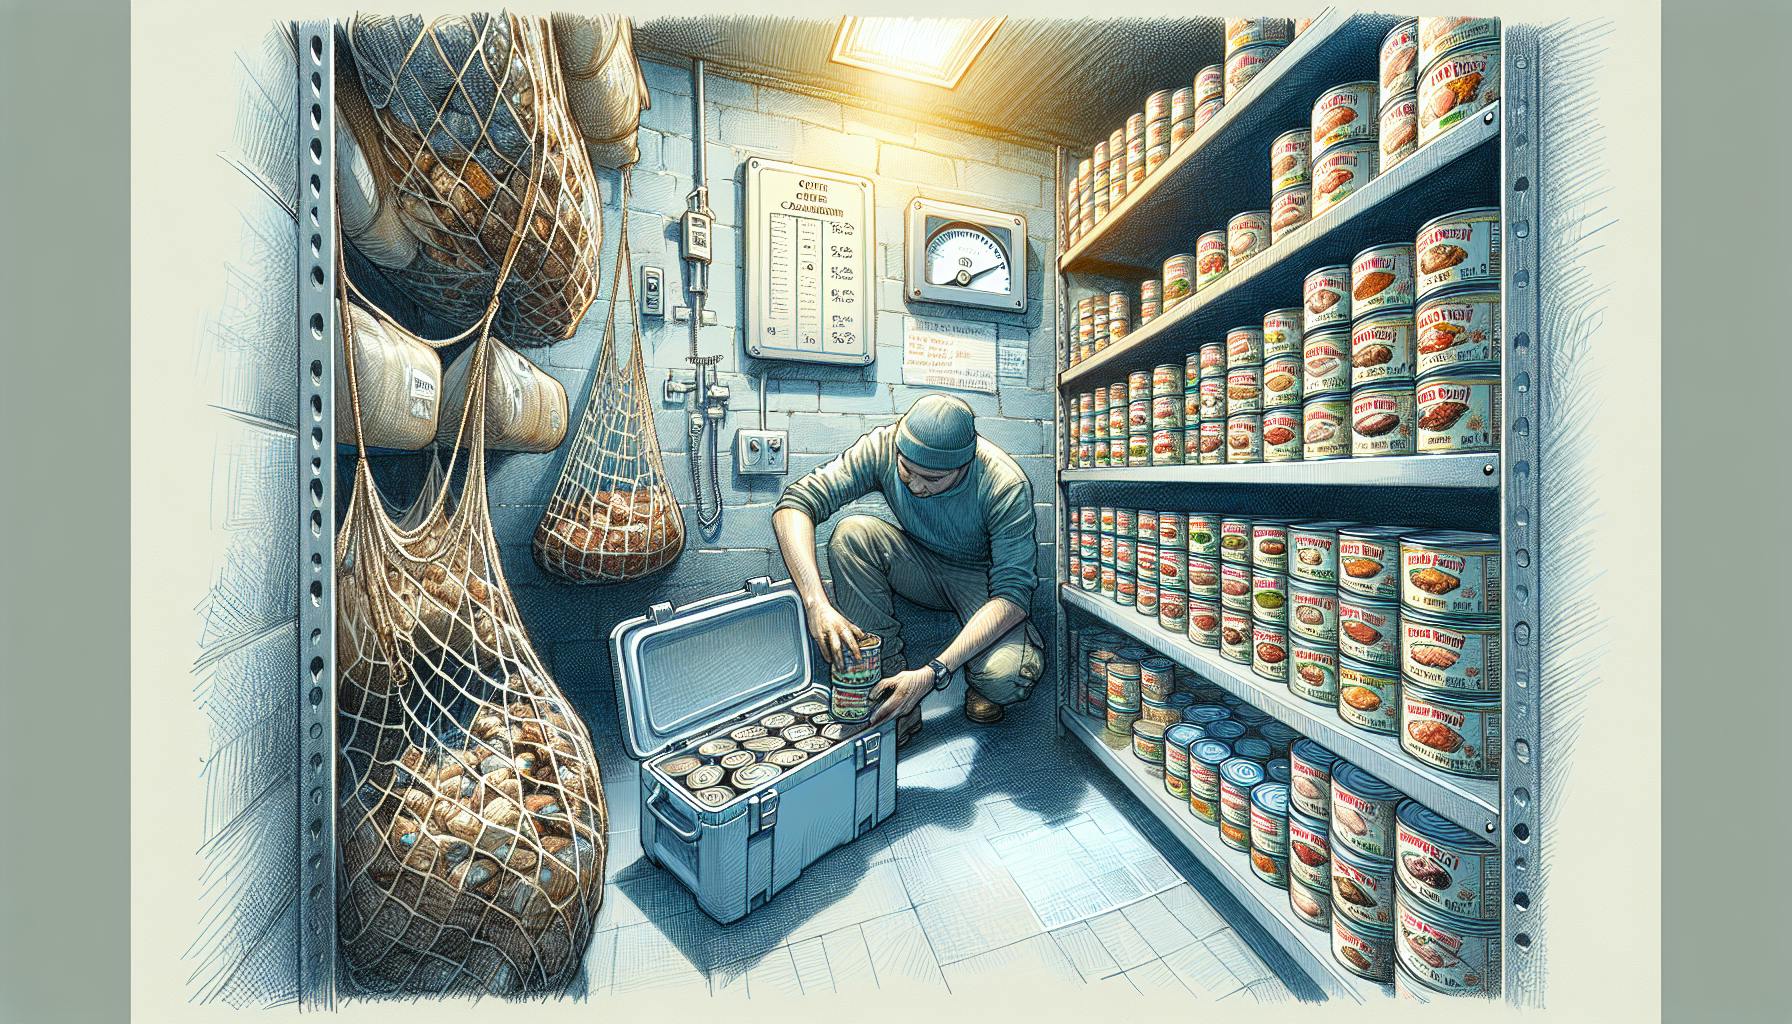
Nutrition and SHTF Food Options
Packing nutritious, non-perishable foods in your get home bag is crucial to maintain energy levels for an extended evacuation. Focus on high-calorie foods that are shelf-stable and easy to transport, like protein bars, trail mix, and MREs (Meals Ready to Eat).
Selecting Non-Perishable Food Items
When selecting food for your get home bag, prioritize the following characteristics:
-
High calorie density: To avoid running out of energy, choose calorie-dense foods like nuts, nut butters, and protein bars. Trail mixes with nuts and dried fruit are also a great option.
-
Long shelf life: Look for foods that are non-perishable and specifically designed for long term storage, with shelf lives of 5+ years. MREs, survival food buckets, and certain brands of protein bars are formulated this way.
-
Lightweight and compact: To avoid weighing down your bag, opt for lightweight, compact foods that take up minimal space, like protein bars, lightweight trail mixes, and vacuum-sealed pouches.
-
Easy to prepare and consume: Select foods that require minimal tools, water, and time to prepare. Protein bars, MRE entrees, jerky, and nut mixes can be eaten straight out of the package.
Caloric Needs and Energy Management
-
Estimate your caloric needs for a multi-day evacuation using a calorie calculator. Plan for rigorous activity like walking long distances.
-
Pack at least 2,000 calories per day. Having extra is better than running out.
-
Stick to slow-burning foods like protein and complex carbs to maintain steady energy levels. Avoid sugar crashes from simple carbs.
-
Schedule regular snack breaks to continually refuel, no matter how rushed you feel. Keeping energy consistent is key.
Food Preparation and Consumption
To minimize required tools and preparation:
-
Choose no-cook foods like protein bars, nuts, jerky, and MREs.
-
Carry a spork or all-in-one mess kit for meals requiring minimal prep.
-
Pack high-calorie drink mixes like electrolyte powders to add calories/nutrients without cooking.
-
Have a water purification method like tablets or a filter in case clean water access is limited.
Innovative SHTF Food Solutions
Several companies now produce specialized survival foods, like:
-
Survival meal kits with MRE-style entrees or just-add-water meals.
-
High-calorie survival bars packed with protein, carbs, vitamins.
-
Portable protein powders to quickly add nutrition.
These foods offer easy portability and preparation - perfect for get home bags.
Food Storage and Preservation
To prevent spoilage:
-
Store food in airtight, waterproof bags or containers.
-
Wrap foods individually to avoid cross-contamination.
-
Inspect food at regular intervals for signs of spoilage.
-
Follow all storage instructions from manufacturers. Certain items may require climate-controlled storage.
By carefully selecting and storing high-calorie non-perishables, you can pack reliable nutrition to fuel an evacuation by foot if disasters strike.
Shelter and Warmth for Urban Survival
Creating an effective shelter is critical for survival in an urban environment. A durable tarp, tube tent, or emergency blanket can provide protection from wind, rain, and cold. When choosing gear, aim for versatile, packable options that offer insulation and water resistance without adding unnecessary bulk.
Creating an Emergency Shelter
- Use a tarp (at least 8'x10') to create an A-frame shelter by propping up two ends and staking down the sides. This allows rain and wind to shed while trapping body heat inside.
- Inflatable tube tents provide insulation when filled with leaves or debris. Anchor firmly and pile material along the sides.
- Emergency blankets reflect up to 90% of radiant heat. Wrap around your body or use overhead for shelter.
- Use available materials like tree branches, debris, cardboard etc. to add insulating layers to your shelter.
Best Budget Rain Gear Selection
Quality rain gear is vital, but can be costly. Excellent budget options include:
- Frogg Toggs Ultra-Lite2 Rain Suit - Extremely affordable, waterproof, and breathable. Packs down small.
- Charles River Apparel Pacific Rain Poncho - Sturdy vinyl poncho with hood. Compact and reusable.
- Mountain Warehouse Pakka Rain Poncho - Lightweight, tear-resistant poncho with stuff sack.
Focus on waterproof, durable fabrics with taped seams. Avoid cheaper plastic ponchos that can tear easily.
Insulating Clothing for Temperature Control
Proper layers are key for maintaining warmth. Useful options include:
- Merino wool base layers - Retains warmth even when wet and resists odors.
- Fleece mid layers provide lightweight, breathable insulation.
- Packable down or synthetic jackets add significant warmth for their weight.
- Windproof outer layers block convection heat loss from wind.
Having multiple lighter layers allows adaptable insulation as conditions change.
Urban Shelter Considerations
Finding shelter in an urban area poses unique challenges:
- Scope out public buildings, garages, tunnels ahead of time for potential shelter spots. Obtain permission where possible.
- Avoid areas with excessive foot traffic or danger from falling debris.
- Rooftops can provide shelter options not available at street level if safely accessible.
- When creating your own shelter, utilize urban structures to block wind/rain.
Adaptability is key. Continuously reassess your situation and shelter needs.
Adapting Shelter Strategies for Different Climates
Adjust your shelter plans based on climate:
- In cold weather, focus on blocking wind and precipitation. Prioritize insulated walls/roof.
- In hot environments, maximize airflow and shade. Use reflective blankets overhead.
- In wet conditions, elevate shelter floor, dig trenches to divert runoff. Waterproof exterior.
- In dry climates, insulate shelter to retain existing moisture and reduce sweat loss.
Regularly monitor and adapt for changing weather patterns in your region. Prepare materials for multiple scenarios.
First Aid and Health Maintenance
Prepare to treat injuries and illness with a trauma kit, medications, toilet paper, baby wipes, and other key medical supplies. Having these essentials in your get home bag can help you address medical issues and maintain health during an emergency situation.
Building an Ultralight First Aid Kit
When packing your get home bag, it's important to have a comprehensive yet lightweight first aid kit. Focus on including versatile supplies that can treat a wide range of injuries and ailments. Some must-have items include:
- Adhesive bandages
- Gauze pads and wraps
- Antibiotic ointment
- Anti-diarrheal medication
- Pain relievers
- Antihistamines
- Sterile gloves
Avoid bulky kits and instead opt for miniature or travel-sized versions of supplies. Multi-use tools like tweezers, scissors, and a safety pin allow you to conserve weight and space while remaining prepared.
Addressing Common Injuries and Ailments
Your get home bag first aid kit should enable you to effectively treat common issues you may face during an emergency trek home or while waiting out a disaster scenario. Be equipped to handle:
Cuts and Scrapes: Clean with soap and water if available. Apply antibiotic ointment and cover with a sterile bandage.
Sprains: Rest, ice, compress with an ace bandage, and elevate the injured area above heart level. Take an anti-inflammatory medication.
Dehydration: Drink clean water slowly over time. Consume electrolyte supplements if available. Get out of direct sunlight.
Diarrhea: Take anti-diarrheal medication. Drink fluids containing sugar and electrolytes.
Allergic Reactions: Take antihistamine medication. Monitor breathing difficulties and seek immediate medical care if they develop.
Hygiene Essentials to Prevent Illness
Maintaining personal hygiene is crucial for preventing illness when access to clean water and sanitation is limited. Be sure to pack:
- Travel toilet paper and trowel
- Baby wipes
- Hand sanitizer
- Bar soap
- Toothbrush and toothpaste
- Feminine hygiene products
Strive to properly dispose of waste, wash hands frequently, and create barriers between skin and contaminated surfaces.
Special Considerations for Personal Medications
If you take any prescription medications, include at least a week's supply in your bag along with dosage instructions. Have a list of all your medications and medical conditions in case you need assistance. If you have life-threatening allergies, pack epinephrine auto-injectors.
Also prepare for other personal health needs by packing spare eyeglasses, contact lens supplies, and any medical devices you require.
Mental Health and Stress Management
Emergency scenarios can take a toll both physically and mentally. Having healthy coping strategies is key. Useful tips include:
- Take deep breaths
- Stretch and shake your body
- Shift focus to the current task
- Recall motivating thoughts or loved ones
- Stimulate your senses by snacking or listening to music
- Write thoughts and feelings in a journal
Seeking social support can also alleviate crisis-related stress. Check if those around you need any mental health assistance as well. By monitoring both your physical and mental wellbeing, you’ll be better equipped to safely get home.
Tools and Gear for Self-Sufficiency
Round out your loadout with work gloves, duct tape, zip ties, cash, a bandana, safety pins, and other versatile equipment.
Essential Tools for a Minimalist Get Home Bag List
When packing light, focus on versatile, multi-use tools. A good knife, flashlight, and fire starter kit will cover several bases with little added weight. Consider a multi-tool instead of several separate tools - options like the Leatherman Skeletool or Gerber Dime include pliers, screwdrivers, bottle openers, and other functions while keeping things compact. A bandana can substitute for gloves, extra clothing, shelter material, and more. Duct tape and zip ties can patch gear or create shelters. Prioritize utility over comfort - a minimalist bag is for getting home, not long-term survival.
Versatile Gear for Urban and Wilderness Survival
Certain items work well in both urban and wilderness settings. 550 paracord is strong, versatile cordage for shelter, gear repairs, traps, and more. A good knife and multi-tool address several needs from self-defense to food prep. Water purification tablets make found water drinkable almost anywhere. A micro fishing kit takes up little space while providing a protein source if needed. A compass and map aid navigation without electronics. Mini first aid kits treat injuries in any location. Focus on gear doing "double duty" across environments.
Navigation Aids: Maps, Compass, and Land Navigation
Don't rely solely on GPS or phones for navigation. Have a compass and maps of your area and known routes home. Practice using them to take bearings and triangulate positions. Understand the declination adjustment between true and magnetic north. Know key terrain features, water sources, potential shelters, and hazards along your route. Use the sun's location to estimate direction. Navigate by day using landmarks; use stars at night. Practice navigation skills now before you need them.
Communication Devices for Emergencies
A get home bag should include some form of emergency communication. A handheld two-way radio allows communication with others monitoring the same frequencies, especially useful for coordinating with family or group members. Satellite messengers like the inReach Mini transmit text messages and SOS alerts via satellite when beyond cell coverage. Both allow quieter communication than phones if avoiding detection. Whistles also signal for help while conserving voice. Have multiple options in case one fails or networks are overloaded.
Securing Your Gear: Locks, Cables, and Stealth
Take steps to protect your gear whether on your person, stashed as caches, or left briefly unattended. Use locks and cables to secure packs and tools, stowing high value items deep inside. Maintain a low profile, avoid drawing attention, and blend into your surroundings where possible. Camouflage, muted colors, and hiding gear can prevent theft. Consider creative concealment spots like brush piles, culverts, or buried caches for supplies along your route. Secure and conceal gear properly and only inform trusted allies of cache locations.
Self Defense and Personal Safety
Personal safety should be a top priority when preparing a get home bag. Having non-lethal self defense options and basic protective gear can provide peace of mind if you find yourself in an unsafe situation.
Non-Lethal Self Defense Options
Non-lethal self defense tools are important to have on hand for personal protection. Consider packing the following items:
- Pepper spray - An effective non-lethal deterrent against threats. Ensure it is legal and allowed where you live.
- Tactical pen - Can be used to strike an attacker or break glass. Looks innocuous.
- Whistle - Get attention and scare away predators. Lightweight option.
- Flashlight - A bright tactical flashlight can disorient threats. Choose one with a strike bezel.
Choosing a Survival Knife
A good quality survival knife is indispensable. Look for these features when selecting one:
- Fixed blade for durability
- Full tang construction
- High carbon steel blade (1095 or D2)
- Serrated edge for cutting rope, wood, etc
- 4-6 inch blade length for utility
- Rubberized grip for secure handling
Top knife choices: Morakniv Bushcraft, Ontario RAT 3, ESEE Izula II.
Firearms for Self Defense: Training and Legal Considerations
If choosing to carry a firearm, proper training and understanding local laws are mandatory. Consider taking defensive shooting and gun safety courses. Research state and local regulations thoroughly first.
Evasion Techniques for Urban Escape
Developing evasion skills can help you discreetly escape threats:
- Remain alert and aware of surroundings
- Identify escape routes and hiding spots
- Use shadows, crowds, distractions to stay unseen
- Walk with confidence and purpose
- Have contingency rendezvous points
Practice navigation skills regularly.
Improvised Weapons and Tools
In a pinch, everyday items can be repurposed for self defense:
- Ballpoint pens and keys - Strike with pointed ends
- Belt or bandana - Restrain limbs or strangulation
- Heavy flashlight - Strike with force
- Pepper or hot sauce - Throw in assailant's face
- Rocks, bricks - Bludgeon threats
Use good judgement and only harm as last resort.
Conclusion: Final Thoughts on Your Get Home Bag for 2023
Having a well-stocked and organized get home bag is an essential part of emergency preparedness. As we've explored, the specific contents will vary based on your needs, but some key items like water, food, first aid, navigation tools, and other survival gear should be included.
Here are some final tips for maintaining your get home bag:
-
Re-evaluate your bag's contents at least twice a year. Update items that may have expired, replace gear that is damaged, and tweak your loadout based on lessons learned from practice hikes or changes in your health, route options, etc.
-
Inspect and organize your bag after each use. Clean out any garbage, repack items neatly so you know where everything is located, check battery levels, and replace anything used up during your last outing.
-
Practice using your get home bag under varied conditions - take different routes, practice navigation skills, test your first aid knowledge, and challenge yourself with time trials. Experience is the best teacher.
-
Consider having multiple get home bags - one full version for your vehicle, a pared down bag for your workplace, and a lightweight backup stashed along your route. Redundancy is key.
Preparing now allows you to act quickly and decisively if an emergency situation arises. With a well-stocked get home bag, essential navigation skills, and regular practice under your belt, you'll be ready to handle whatever comes your way in 2023 and beyond. Stay safe out there!