When building an emergency food supply, most people would agree that nutritional balance and adequate calories are crucial for health and survival.
By understanding the core components of a well-rounded food bucket, you can create a 30-60 day supply of meals tailored to your family's needs.
In this article, we'll explore the essentials for stocking a survival food bucket, from mountain house meals to food grade packaging, covering considerations like nutritional balance, shelf life preservation, and ease of preparation.
Introduction to Survival Food Buckets
A survival food bucket contains long-lasting foods designed to sustain you when stores are inaccessible during an emergency. This article covers key aspects of assembling your own survival bucket.
Understanding the Concept of an Emergency Food Bucket
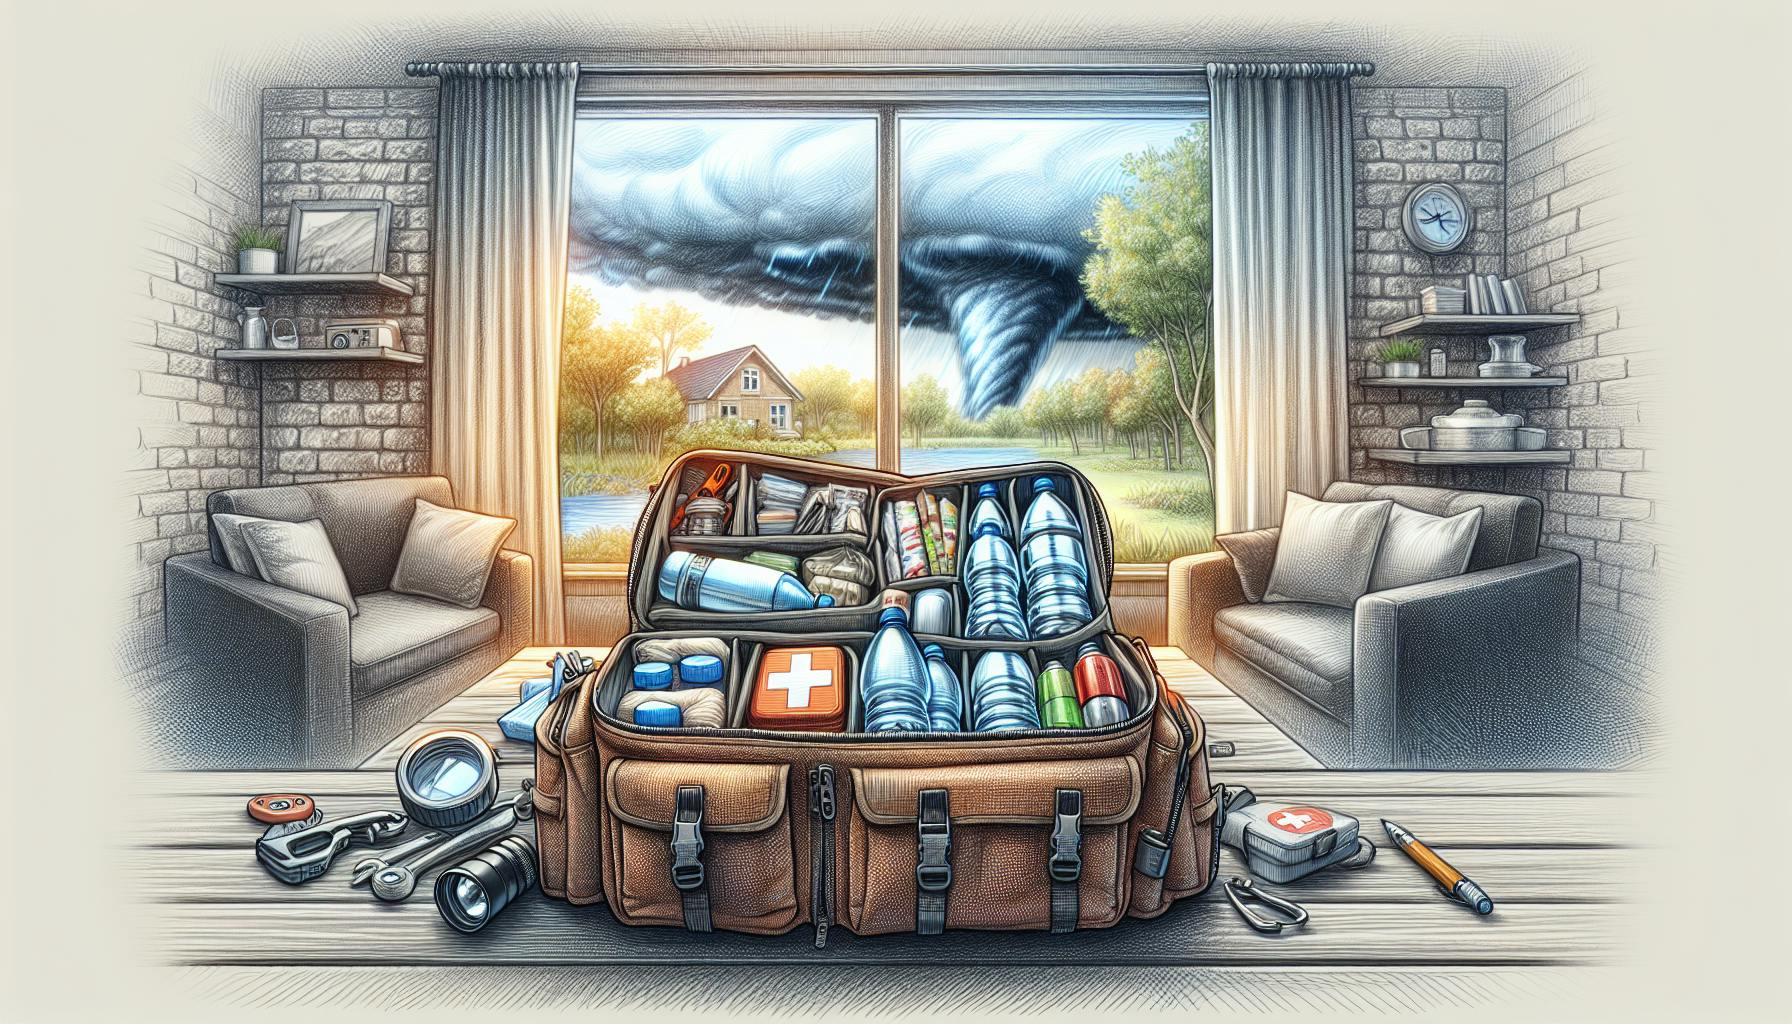
Having reliable access to food is critical in a disaster when normal supply chains are disrupted. A survival food bucket offers a self-contained reserve to feed your family until services resume. The portability also allows grabbing it quickly if you must evacuate.
Ideal emergency food is nutritious, long-lasting, and requires minimal preparation. A food bucket organizes portions for each person, making it easy to manage limited resources. Rotating the stock also prevents waste from expiration.
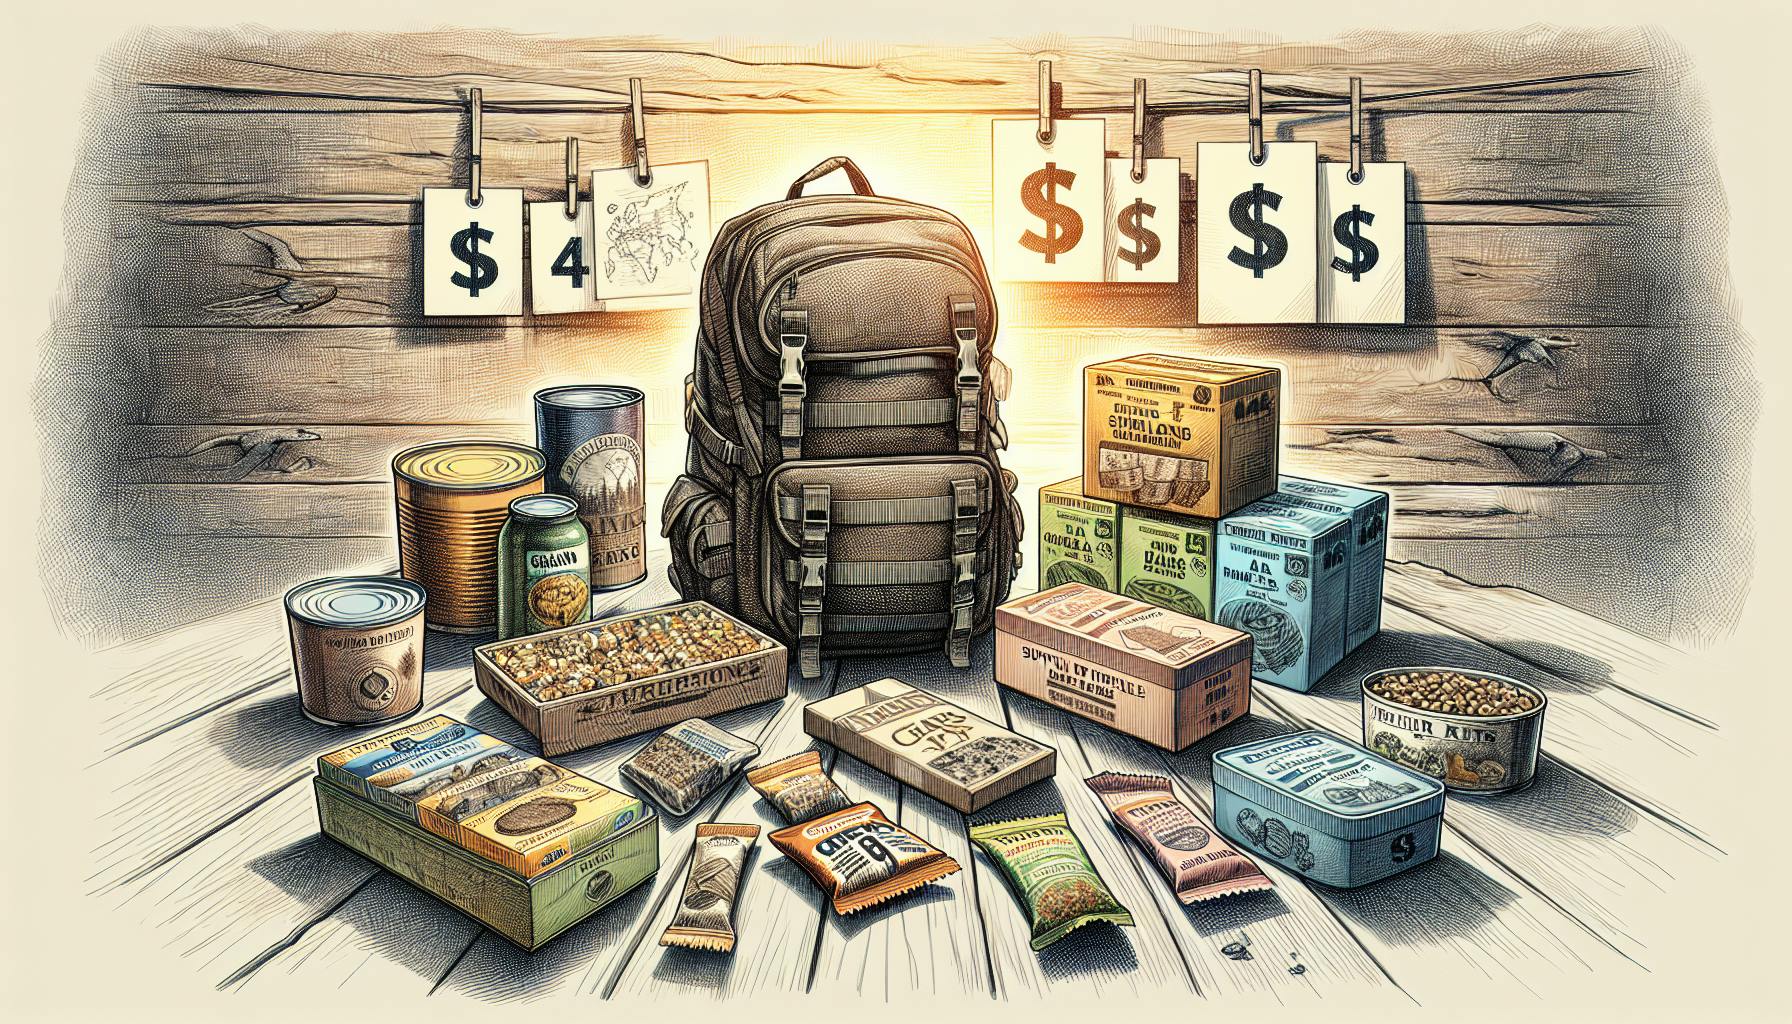
Best Survival Food Bucket Overview
Many companies sell pre-packaged survival buckets with items like freeze-dried entrees, drinks, snacks, and basic cooking equipment. Top-rated options provide a nutritionally balanced variety for short or long-term needs.
Mountain House and Wise Foods are leading brands, known for tasty meals with 10-30 year shelf lives. The convenience makes them worth the higher cost for those lacking time to assemble their own.
DIY Survival Food Bucket Essentials
With some planning, you can create a custom emergency food bucket tailored to your family's preferences. Include familiar ingredients to provide comfort along with sustenance.
Focus on staples like rice, beans, pasta, oats, shelf-stable milk, canned goods, trail mixes, and protein bars. Calculate portions for at least 3 days per person. Also pack basic mess kits, can opener, utensils, paper plates, etc.
Rotate items from your pantry before expiration dates and refill as needed. Add desiccants and oxygen absorbers to prolong freshness.
The Role of Mountain House Meals in Your Bucket
Including some Mountain House freeze-dried pouches adds tasty variety while requiring only boiled water for preparation. They're compact, nutrient-dense, and have up to a 30-year shelf life.
Great options are pasta primavera, chicken teriyaki, and beef stroganoff for quick hot meals. The brand also offers egg and breakfast skillet pouches. Just add a few each time you replenish your bucket.
Selecting a Food Grade Bucket for Safety and Durability
Store emergency food in buckets rated "food grade" to avoid chemical leaching. Look for the #2 HDPE resin identification code.
Opaque buckets prevent light exposure which can degrade food over time. Gamma lids allow easy access without fully removing the cover. Just remember to add desiccants to absorb moisture.
With planning and some basic supplies, assembling your own survival food bucket can ensure you face disasters with one less uncertainty.
What foods should I stockpile for survival?
When building your survival food supply, it's important to have a balanced mix of shelf-stable foods that will provide adequate nutrition to keep you healthy in an emergency. Here are some of the most essential categories to focus on:
Proteins
Stock up on canned and pouched meats like tuna, chicken, turkey, salmon, sardines, beef stew, and chili. These provide protein and fat to support muscle mass and satisfy hunger. Chickpeas, beans, lentils, and nuts are also great sources of plant-based protein with long shelf lives.
Fruits and Vegetables
Having vitamin-rich fruits and vegetables is crucial, so stock up on canned produce like carrots, peas, corn, green beans, beets, pineapple, pears, peaches, and applesauce. Go for low sodium options when possible. Also consider shelf-stable 100% fruit juices.
Grains
Grains are an important base for meals and provide key nutrients and fiber. Opt for whole grains like oats, brown rice, quinoa, barley, and whole wheat crackers, cereal, and pasta whenever possible. These tend to have longer shelf lives than refined grains.
Dairy
Powdered milk, evaporated milk, and shelf-stable UHT milk boxes are convenient for adding dairy. Hard cheeses also have very long shelf lives.
Other Essentials
Oil, honey, maple syrup, peanut butter, jam, trail mix, granola bars, bouillon cubes, spices, tea, coffee, and electrolyte mixes help round out your food supply.
Focus on nutrient density, variety, and balance across all food groups. Track expiration dates and rotate your stock. Most commercially packaged survival foods last at least 12 months in cool, dark storage.
Why is Costco selling emergency food kits?
Costco selling emergency food kits makes a lot of sense given their business model and customer base. Here are some potential reasons why:
- Meeting customer demand - With natural disasters, global unrest, and other uncertainties, more people want to be prepared with emergency food. Costco is responding to this growing customer need.
- Good value - The emergency food kits likely fit with Costco's commitment to offering quality products at a great value. The kits can provide nutritious food at a competitive price point.
- Product partnerships - Companies like Nutristore may have approached Costco about selling their emergency food products. The kits complement Costco's existing food offerings.
- Appealing to families - The starter kits with full meals cater well to families looking to put together emergency food supplies. This matches much of Costco's core demographic.
- Ease of shipping - With free shipping on the kits, Costco makes it simple for customers to have emergency food delivered. No need to carry heavy buckets or #10 cans out of the warehouses.
While the $6,200 Nutristore kit sits on the lower end price-wise, the demand for emergency food likely makes the product lineup worthwhile for Costco to offer. And the set provides solid value for families wanting starter solutions to prepare for disasters or emergencies.
What are the top 10 survival foods?
When building your emergency food supply, focusing on shelf-stable, nutrient-dense foods is key for survival. Here are the top 10 survival foods to stock up on:
- Whole grains like oats, brown rice, quinoa, and whole wheat pasta - These are packed with fiber and nutrients. Look for whole grain options with longer shelf lives.
- Canned goods like beans, vegetables, fruits, soups, and meats - Canned goods are convenient, affordable, and have a long shelf life. Prioritize essentials like beans for protein.
- Nuts and seeds - High in protein, healthy fats and nutrients. Stash a variety like almonds, walnuts, sunflower and pumpkin seeds.
- Dried beans and lentils - Excellent sources of plant-based protein and fiber. They last for years when properly stored.
- Canned or dried vegetables and fruits - Stock up on essentials like tomatoes, green beans, carrots, peaches, applesauce and raisins.
- Shelf-stable dairy like powdered milk and shelf-stable UHT milk boxes - Useful for cooking and nutrition.
- Canned meats like tuna, salmon, chicken - Canned meats provide protein and convenience.
- Comfort foods like coffee, honey, maple syrup, chocolate, crackers - These boost morale in stressful times.
- Spices and condiments - Essentials like salt, pepper, oil, vinegar, soy sauce, ketchup, mustard, and hot sauce make storage foods more palatable.
- Water and water filtration - Stockpile bottled water and water filtration methods. Water is critical for survival.
Focus on nutrition, shelf life, affordability, and multi-purpose ingredients. Build a diverse food supply with these survival food essentials.
How do I prepare for 30 days of food?
When preparing a 30-day supply of food for an emergency situation, it's important to focus on shelf-stable items that provide nutritional balance. Here are some tips:
Canned and Dried Goods
Stock up on ready-to-eat canned goods like:
- Meats (tuna, chicken, salmon)
- Fruits and vegetables
- Soups and chili
- Beans, lentils, peas
Also include dried goods like pasta, rice, oats, and boxed cereal. These have a long shelf life and are easy to prepare.
Essential Staples
Don't forget salt, pepper, oil, spices, sugar, peanut butter, jelly, honey, ketchup, mustard, and other flavor boosters. Trail mix, granola bars, crackers, and nuts also make good additions.
Hydration
Store plenty of shelf-stable drinks like bottled water, juice boxes, and powdered milk you can mix with water. Broth and electrolyte mixes are also handy for hydration.
Balanced Nutrition
When selecting foods, aim for balance across the food groups - fruits, vegetables, protein, dairy, and grains. For example, pair canned tuna with crackers, peanut butter on cereal or oats, and canned fruit mixed into yogurt.
Food Safety
Store your 30-day food supply in a cool, dry place in airtight containers. Check expiration dates and rotate stock as needed. Be sure to include a non-electric can opener.
Following these tips will help you build an emergency 30-day food supply that's nutritious and easy to use when needed.
sbb-itb-b932644
Choosing the Best Survival Food Bucket
Selecting the right survival food bucket is crucial to ensure you have adequate emergency provisions. Here are key factors to consider:
Evaluating Pre-Made Emergency Food Buckets
When considering pre-made buckets, assess the following:
- Nutritional balance: Seek buckets with a mix of proteins, complex carbs, fruits/veggies to meet all nutritional needs.
- Calorie levels: Adult buckets should contain ~2,000 calories per day. Tailor buckets for kids, pets.
- Shelf life: Look for 5-10+ year shelf lives, depending on budget.
- Taste: Sample meals first if possible. Food should be palatable.
- Number of servings: Choose based on your family size and expected emergency duration.
- Budget: Premade buckets range from $100-$500 based on contents/brand. Compare cost per meal.
Incorporating Mountain House Bucket Meals
Mountain House is a top brand for delicious, long-lasting bucket meals:
- Wide variety of breakfast, lunch, and dinner options.
- Meals designed for easy preparation with included spices.
- 5-30 year shelf life.
- Buckets available in 60-servings size.
Building a DIY Survival Food Bucket
You can create a custom bucket tailored to your family's needs:
- Shop bulk bins and stores to find budget-friendly ingredients.
- Focus on staples like rice, beans, oats alongside canned or pouched proteins.
- Calculate meals to meet nutritional needs across expected emergency timeframe.
- Utilize oxygen absorbers to extend shelf life.
Ensuring Your Bucket is Food Grade Certified
Only use food grade buckets, which:
- Are BPA-free.
- Won't leach chemicals into food contents.
- Are durable and rodent/insect resistant.
- Have sealable, snap-on lids to seal in freshness.
Tips for Maximizing the Shelf Life of Your Bucket Contents
- Store in cool, dark place to avoid temperature fluctuations.
- Use oxygen absorbers in sealed bucket to remove oxygen exposure.
- Ensure lids have tight seals, checking annually.
- Integrate desiccants to absorb excess moisture.
- Rotate stock as you consume and replace food items.
Nutritional Considerations for a Balanced Emergency Food Supply
Ensuring your survival food bucket contains a nutritionally balanced selection of food is critical for maintaining health during emergencies.
Selecting Foods with Essential Macronutrients
When building your emergency food supply, it's important to incorporate carbohydrates, proteins, healthy fats, and fiber. Complex carbs like whole grains provide sustained energy, while lean proteins help preserve muscle mass. Heart-healthy fats like nuts and seeds support cell and tissue health. And fiber aids digestion and gut health.
Incorporating Vitamins and Minerals
A diverse range of freeze-dried or canned fruits, vegetables, beans, lentils, and animal proteins will help cover your vitamin and mineral needs. Prioritize nutrient-dense picks like sweet potatoes, spinach, tomatoes, salmon, chickpeas and more. A multivitamin can help fill any nutritional gaps.
Addressing Special Dietary Requirements
If you follow a special diet, stock your bucket with suitable options. Gluten-free pastas, dairy-free milk powders, vegetarian proteins sources, and diabetic-friendly foods can help meet your needs.
Preventing Taste Fatigue in Emergency Situations
To prevent taste fatigue over time, include a variety of flavors, textures, and meal types. Having different proteins, complex carbs, fruits, vegetables and seasonings will keep meals interesting.
Calculating and Planning Balanced Daily Rations
When calculating daily rations, aim for 1,200-1,800 calories supplying macronutrients in balanced ratios. For example, 45-65% carbs, 10-35% protein, 20-35% fat. Split calories across 2-3 meals plus snacks. Planning varied, nutrient-dense rations ahead of time ensures you stay nourished if an emergency strikes.
Storing and Preserving Your Emergency Food Bucket
Adopt best practices to maintain the integrity and longevity of your survival food supply.
Understanding the Shelf Life of Stored Foods
When stockpiling food for an emergency, it's important to understand how long different items can be stored before spoiling or becoming unsafe to eat. Shelf life depends on the type of food and how it is stored.
For example, commercially packaged foods like mountain house meals in sealed pouches can often last 5-10 years or more if stored properly. On the other hand, homemade DIY survival food bucket contents like grains, beans, and dehydrated fruits and vegetables may only last 1-2 years before quality degrades.
Factors like temperature, moisture, light exposure, and oxygen can accelerate spoilage. Storing food in a cool, dark, and dry place helps maximize shelf life. Regularly checking containers for signs of spoilage is also essential.
Protecting Your Supply from Environmental Factors
To get the most longevity out of your emergency food bucket, it's vital to protect it from moisture, light, heat, and cold.
- Store bucket in a basement or interior room with stable temps between 50-70°F. Avoid attics/garages with extreme temps.
- Use opaque containers to limit light exposure which can degrade vitamins and fats.
- Ensure lids form tight seals and check periodically for moisture ingress issues. Consider adding oxygen absorbers.
- Monitor conditions with a remote thermometer. Maintain ideal environment to prevent premature spoilage.
Taking simple preventative measures helps ensure your survival food stays nutritious and edible when you need it most.
Implementing a First In, First Out System
When stocking survival supplies like food grade buckets, it's essential to implement a first in, first out system so older inventory gets used before newer:
- Label each bucket/container with contents and date. Store new additions behind older ones.
- Integrate newly purchased survival food into regular diet to use up existing supply first.
- Take inventory every 6 months and use up opened pouches/containers within next 1-2 regular meals.
Following this simple system helps achieve maximum freshness and avoid waste.
Regularly Monitoring for Signs of Spoilage
To maximize shelf life, it's important to periodically inspect your emergency food supply for any signs of spoilage:
- Check containers for swelling, leaking, holes, rust, or pest infestation every 3 months.
- Open pouches and smell contents every 6-12 months for rancid odors.
- Visually inspect powdered goods yearly for clumping, color changes, webbing, or insects.
- Taste small samples of oldest items yearly to check quality and nutritional value.
Catching issues early allows for disposal, replacements, or shifting inventory to maintain integrity of your critical survival stockpile.
Setting Up Resupply Cycles for Your Bucket
While commercially packaged survival food can often last many years, it's still smart to setup a resupply cycle for your emergency bucket to account for:
- Consuming and replacing items from regular practice meals
- Rotating out expired or short-dated products
- Replenishing after tapping supply during an actual emergency
A good goal is to review contents and order replacements every 12 months. This ensures you always have adequate reserves in case of a prolonged crisis.
Assembling Your Own DIY Survival Food Bucket
Creating your own personalized emergency food bucket allows you to cater it to your specific nutritional needs and preferences.
Developing a Comprehensive Food Bucket Inventory
When assembling a DIY survival food bucket, consider including:
- Canned goods like beans, vegetables, fruits, soups, meats
- Dried grains like rice, pasta, oatmeal
- Trail mixes with nuts, seeds, dried fruits
- Powdered milk, eggs, broths
- High-calorie granola/protein bars
- Spices, seasonings, cooking oil
- Powdered drink mixes
Focus on nutrient density, balanced nutrition across food groups, and adequate calories. Favor shelf-stable items with 1+ year expiration dates.
Budgeting for Your Emergency Food Supply
- Buy ingredients in bulk quantities to lower costs
- Seek out sales, coupons, and bulk discounts
- Allocate $X per month towards stockpiling inventory
- Gradually build supply over time
Finding Deals on Bulk Purchases
- Shop at big box stores like Costco or Sam's Club
- Check online sites like Amazon, Thrive Market, Emergency Essentials
- Sign up for loyalty programs, email lists for periodic sales alerts
Considering the Convenience of Pre-Made Kits
Pre-made emergency food kits like Mountain House are convenient but expensive. Consider adding some kits to supplement your homemade bucket for short-term crises. Focus DIY bucket on bulk ingredients for sustained emergencies.
Ensuring Food Safety with Proper Packaging Techniques
- Use food-grade plastic buckets with tight lids
- Pack ingredients in Mylar bags or oxygen absorbers to prevent spoilage
- Label contents and expiration dates clearly
Following proper storage methods preserves freshness and prevents waste, protecting your investment in emergency provisions.
Practical Use and Maintenance of Your Emergency Food Bucket
Regularly engaging with your survival food bucket is key to ensuring its reliability and your familiarity with its contents when you need them most.
Sampling and Rotating Stored Foods
- Set reminders to try out a sample meal from your bucket every 3-6 months. This allows you to:
- Test best survival food bucket shelf life and quality over time
- Refresh your knowledge on preparation methods
- Identify items to restock
- When opening a new food pouch, write the date on it with a marker. Then be sure to use up open pouches before ones without dates. This first in, first out rotation system maximizes freshness.
- Make note of any changes in taste, texture, or appearance in your sampled meals. Watch for early signs of spoilage.
Exploring Recipes and Preparation Methods
- Search online or in prepper books for recipes using your specific emergency food ingredients. Test some out.
- Pay attention to water amounts and cooking directions. Make any adjustments needed for your personal taste.
- Try cooking with alternate methods like a camp stove, solar oven, or even no cook. This will build skills for emergency food bucket use during a crisis.
Mastering Alternate Cooking Techniques
- Using a portable camp stove with your emergency food develops familiarity for when utilities are out.
- Consider a small solar oven as backup option. Test it ahead of time with simple recipes.
- Some foods like energy bars or add hot water pouches require no cooking at all. Have meals like these ready to go.
Streamlining Meal Decisions During Stressful Times
- Pre-decide simple DIY survival food bucket meal plans for breakfast, lunch, dinner.
- Store these basic meal plans with your food supplies for quick reference if faced with decision fatigue during an emergency.
- Plan balanced nutritional meals but keep recipes simple with few ingredients.
Minimizing Waste Through Smart Rationing
- Calculate how long your food bucket would last for 1-2 people at minimum rations.
- Institute strict rationing only when certain hardships arise vs. overrationing early on.
- Portion out bulk ingredients like rice or beans to prevent overuse or spoilage of open packages.
Following this key advice for engaging with and maintaining your mountain house bucket will ensure optimal readiness when you need to rely on your emergency food reserves. Consistent practice makes for confident use.
Concluding Insights on Survival Food Bucket Preparation
Recap of Caloric Needs and Nutritional Balance
When preparing your survival food bucket, it's critical to accurately calculate your family's caloric needs and ensure you have the right balance of nutrients. On average, plan for ~2,000 calories per person per day. Prioritize nutrient-dense foods like beans, lentils, nuts, dried fruits, and powdered milk.
The Value of Including Comfort Foods and Familiar Ingredients
Don't underestimate the psychological value of having some comfort foods and familiar ingredients in your emergency food supply. Things like coffee, tea, honey, spices, and even chocolate can go a long way toward morale.
Storing Recipes and Usage Instructions
Make sure to print out recipes, preparation instructions, and cooking directions for the food items in your bucket. This will eliminate guesswork if you need to rely on your emergency supply. Consider laminating the pages for durability.
Reaffirming the Importance of Quality Packaging
Investing in high-density plastic buckets with gamma lids ensures your food stays fresh for decades. Oxygen absorbers are also essential. Take steps to fully seal and protect your survival food bucket.
Final Recommendations for Emergency Food Preparedness
Test and rotate your emergency food supply each year. Mark expiration dates clearly on all packages. Keep a detailed inventory and replace anything that goes bad. Being prepared with adequate nutrition buys you time in any crisis scenario.